
In this short article, we will see what’s the best way to build a Python 3.7 app which runs on AWS Lambda and requires additional packages (i.e. urlib3, pyyaml, requests).
Note: This article requires a minimal knowledge of Docker, AWS Lambda and of course Python.
Disclaimer: All thoughts and opinion are my own.
AWS Lambda and Python
AWS Lambda currently supports three Python versions with specific runtime environments.
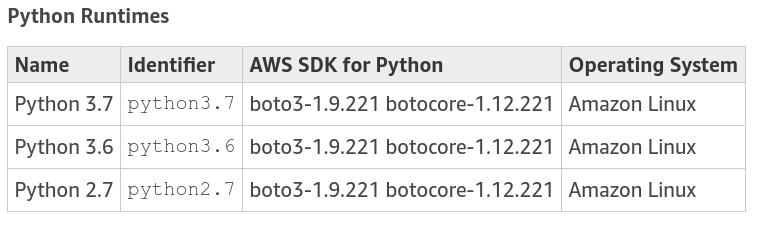
From the above list, it’s clear that every Python runtime uses Amazon Linux, which is a distribution that evolved from CentOS and Red Hat Enterprise Linux (RHEL).
Why this information is useful?
It is useful because if we are using an external package in our Python app, it has to be compatible with that specific Linux distro (see what’s behind pip here: https://pydist.com/blog/pip-install).
The main “problem” is we don’t have control of what can be installed on a Lambda environment due to its serverless nature (which is a huge benefit from a cloud management perspective).
The solution is simple: bundle and ship our script/s and the package/s together.
Considering the above information, the next natural step is to build and bundle the entire application using the AWS Docker Amazon Linux 2018.03 image (https://hub.docker.com/_/amazonlinux)
Create the developer environment
In this section, we will see how to set up from scratch our Python 3.7 environment using the AWS Docker image.
Let’s start by creating a Dockerfile based on the Amazon Linux image, then add some lines to install Python 3.7 and pip.
FROM amazonlinux:2018.03

RUN yum update -y
RUN yum install -y \
    gcc \
    openssl-devel \
    zlib-devel \
    libffi-devel \
    wget && \
    yum -y clean all

WORKDIR usr/src

# Install Python 3.7
RUN wget https://www.python.org/ftp/python/3.7.4/Python-3.7.4.tgz
RUN tar xzf Python-3.7.4.tgz
RUN cd Python-3.7.4 ; ./configure --enable-optimizations; make altinstall
RUN rm Python-3.7.4.tgz
RUN rm -rf Python-3.7.4
RUN python3.7 -V

# Install pip
RUN wget https://bootstrap.pypa.io/get-pip.py
RUN python3.7 get-pip.py
RUN rm get-pip.py
RUN pip -V
Finally, we can build our image with the following command where amazonlinux-py3.7 is an arbitrary image tag.
docker build -t amazonlinux-py3.7 .A complete example
Let’s try to create a simple function which calls an API and returns a response.
From the terminal, we can create a local folder for this project, then move inside it.
mkdir lambda_python
cd lambda_python
Inside our project directory we can create a file called lambda_function.pywith the following code:
import requests

def lambda_handler(event, context):
   response = requests.get('https://api.github.com')

   return response.content
The function named lambda_handler is the handler function that Lambda calls when the function is invoked.
(for more info see: https://docs.aws.amazon.com/lambda/latest/dg/python-programming-model.html)
The function as it stands won’t work because we need to install the requestpackage first.
To satisfy the import statement we should open an ssh session in our previously built Docker container with:
docker run -v $(pwd):/my_project -ti amazonlinux-py3.7and install the requests package inside our project directory with:
pip install requests -t /my_projectThe content of our project folder should look like this:
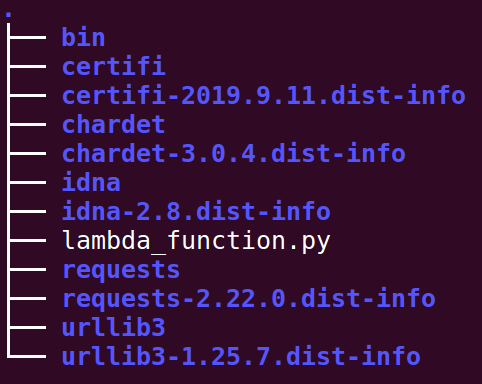
Let’s close the ssh connection (writing exit in the terminal) and go to the next step.
Bundle and deploy on AWS
To create our package we should compress in a .zip file all the content of our project directory, packages and .py script.
Let’s move inside our project folder (lambda_python) and run the following command:
zip -r my_lambda.zip *Finally, we are ready to create and deploy our Lambda Function.
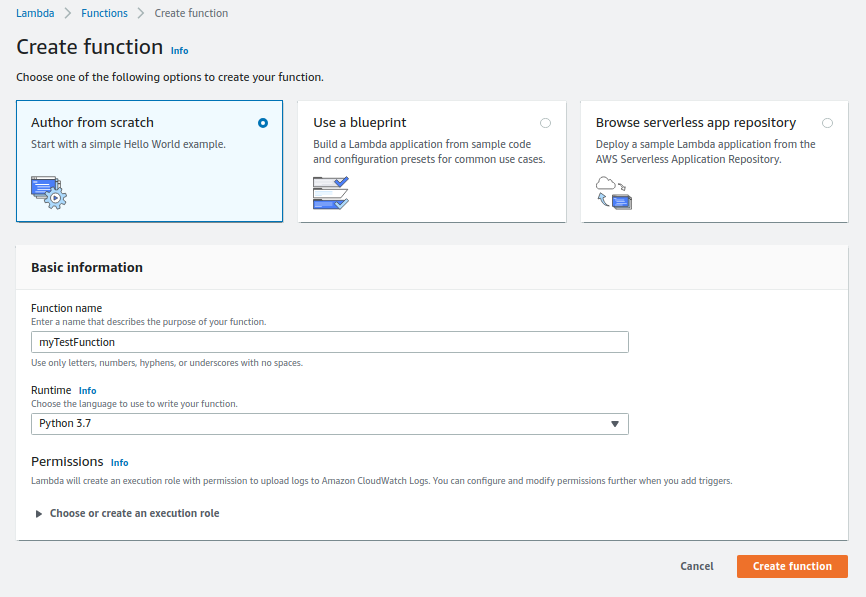
From the AWS Lambda dashboard, we can click on “Create function”.
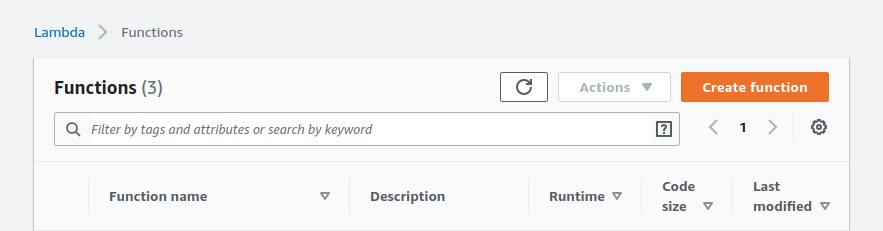
Then, select “Author from scratch”, write a function name and select Python 3.7 as the runtime environment. Finally, we can press “Create function”.
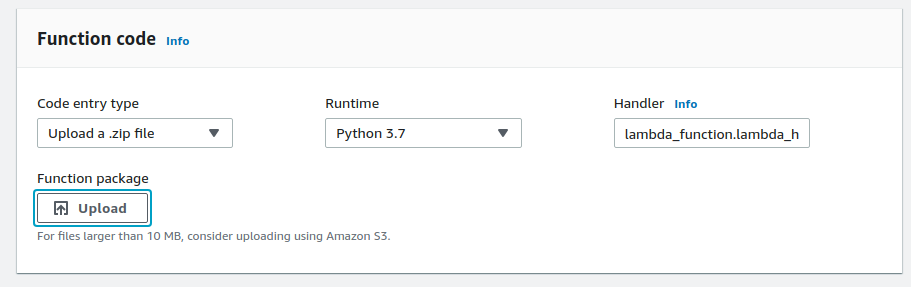
Almost in the middle of the page in the “Function code” section, using the “upload” button we can upload the my_lambda.zip file previously created and then click “save” (on the top right).
Well done!! our Lambda function is ready to be tested.
Testing
From the AWS Lambda dashboard, we can click on “test” (top right) and configure a basic test event (see picture below).

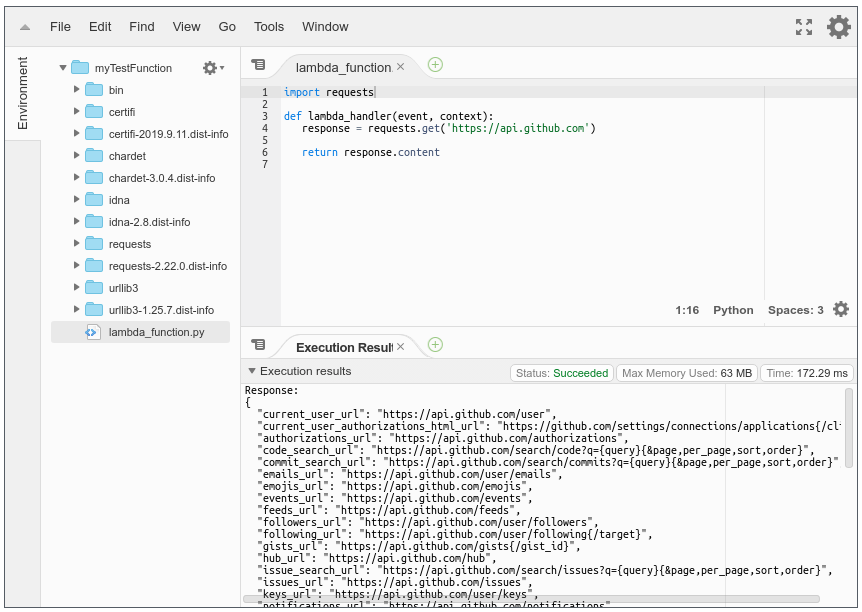
If we highlight the lambda_function.py file from the web editor and press “test” we should see an “Execution Result” tab with the output of the call.
Final consideration
With the approach described in this article, it is possible to build and package every type of Lambda function but…..
Before going ahead with any project let’s be aware of the current AWS Lambda main limitations:
Deployment package:
- size 50 MB (zipped, for direct upload)
- 250 MB (unzipped, including layers)
- 3 MB (console editor)
Function timeout: 900 seconds (15 minutes)
[Full list here: https://docs.aws.amazon.com/lambda/latest/dg/limits.html]
If the .zip bundle is bigger than the supported size there are at least two other alternatives:
- Bundle the rest(or part) of the files/packages in an S3 bucket and deploy the main .py handler in Lambda. The main handler for each call must download and use the S3 files (example here). This is possible since the current Lamda function and layer storage is 75 GB but could cause some performance issue.
- Consider AWS Fargate (https://aws.amazon.com/fargate/).


I had make some changes in Dockerfile to work
FROM amazonlinux:latest
RUN yum update -y
RUN yum install -y \
gcc \
openssl-devel \
zlib-devel \
libffi-devel \
tar \
gzip \
wget \
make \
yum -y clean all